Photo Credit: Brian Smith
The Hopper: A fly for hot days, grass meadows and lazy rivers
Northern BC’s summers are often too short; however, August and September can bring some of the most interesting and fun kinds of fly-fishing: stalking the banks of low-water rivers for big, fat rainbows with large grasshopper patterns.
Grasshopper fly patterns have been around since the early 1900s. My pattern has evolved from Joe’s Hopper and Dave’s Hopper. Joe’s Hopper was originally designed by American Art Winnie in 1913 and called the Michigan Hopper, which was popularized in the western US in the 1930s by renowned angler Joe Brooks and renamed Joe’s Hopper.
Dave Whitlock, perhaps one of America’s most famous fly fishers, redesigned the fly in the 1950s by marrying Joe’s pattern with Dan Bailey’s Muddler Minnow and calling it Dave’s Hopper. The pattern I’ve designed takes these models one step further by using sheet foam to create an extended body, which continues to float after many fish and drownings.
Grasshoppers go through three stages in their one-year life cycle: eggs, nymphs and adults. They mate in late summer and fall, leaving their eggs in burrows under logs, deep in grasses or safe structures. The following spring, eggs hatch into small nymphs without wings; the insects will molt many times, developing wings as they near adult stages in late summer. As adults, they fly to find mates and restart the cycle, and this is when they become targets for fish.
Hoppers are best fished on rivers that run through grass meadows and during hot, lazy summer afternoons when the best fishing is usually over for the day, but the grasshoppers are active and flying. They are clumsy swimmers and you must fish close to or inches from the river’s bank to be successful.
Use a floating line paired with a two-metre-length 4X tippet, as this will turn the large fly over properly and also survive savage strikes from heavy trout in shallow water. Pound the banks, keep your casts short and look for structure like logs, grass clumps, small deep pockets or little riffles; these are places where trout prefer to hide when they are prowling for a ’hopper meal.
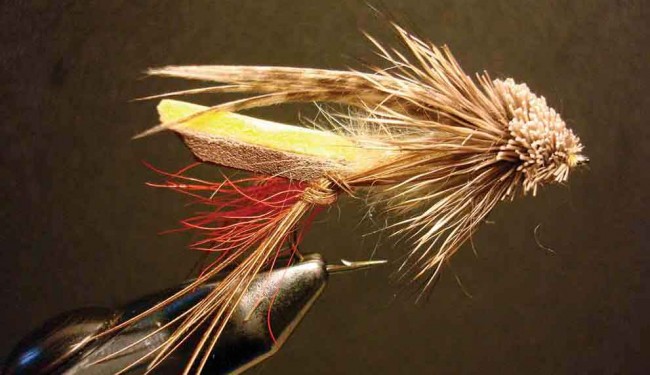
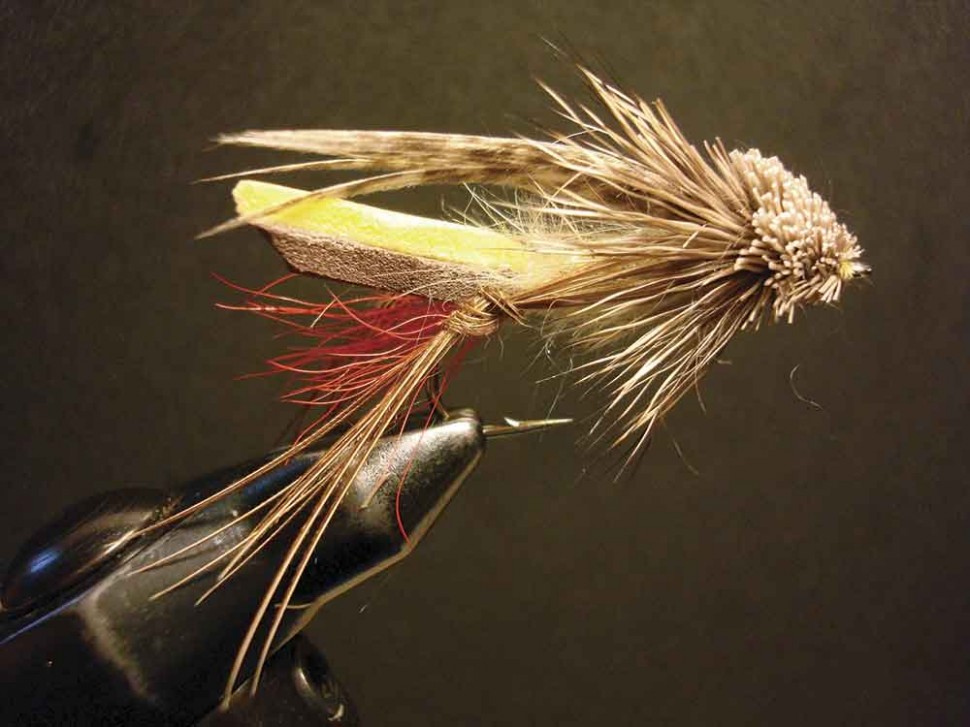
Brian’s Hopper
Hook: Tiemco 200R # 6-10
Thread: UTC 140 hopper yellow
Tail: calf’s tail fibres, red
Extended body: sheet foam,yellow over brown
Abdomen: dubbing,Hare-tron #15 pale olive
Legs: legs-on-a-stick (knotted pheasant sword fibres), olive
Wings: oak-coloured turkey primary sections, laid over body
Head: deer hair natural, tapered bullet style
The most important thing to consider when tying this pattern is to leave lots of room for the bullet head, so begin your tying at the two-thirds point of the hook shank. First, prepare your foam strips for the extended body by cutting a five-mm-wide strip of brown and yellow and cementing them together with a few drops of Krazy Glue. Attach a few fibres of red calf’s tail for the tail. Attach the foam strip and bind it back to the rear of the shank; trim to length of tail as per photo. Form a dubbing loop and dub the body, stopping at the shank’s two-thirds point. Attach the legs, then primary strips.
To form the bullet head, begin with a five-mm strip of deer hairs. Place it on top of the shank, hair points to the rear, and bind softly at first, then very tightly. Do the same under the hook shank. Trim both top and bottom. Now take another five-mm strip, trim the tips off, place it across the shank, bind it tightly and allow it to spin freely around the shank. Pack it rearward tightly with your thumb and first finger; repeat until the shank is filled to the eye with spun hair. Tie your fly off. Finally, use a pair of curved scissors to carefully trim the spun hairs to a bullet shape.


Hi Brian
Was going through my archives and found pictures of you and Justin fishing on the Stellako!
Would like to connect with you but my contact info is out of date.
Please contact me with your info
Cheers
Mark Corney
👤 Mark Corney 🕔 Feb 03, 2018